CB350 Repairs

Before my recent trip to North Carolina I had pulled the motor out of Old Faithful to correct some oil leaks that had cropped up. The leaks did not affect compression and were not very bad. I rarely had to add a cap full of oil to make up for it, but it did make a mess on the outside of the motor. I found a gasket set on eBay and out came the motor. It got a thorough cleaning, along with the gritty, oily frame. I was impressed by the almost new condition of the cam and interior parts as I disassembled the little engine. I took it down to the head; all leaks originated above there. While apart I cleaned all the carbon off the heads and pistons and it all went together nice and shiny. I also took the opportunity to do a careful valve adjustment before putting it back in. A Clean CB350 Motor, Ready for Reassembly When I did the engine work, I had meant to pull the rotor and repair the starter clutch. I have been kick starting Old Faithful since before my Michigan ride, over a year ago, so I bought a repair kit with the intention of restoring the electric start. However, when I took the starter apart, I found it full of crud and the starter clutch turning as it should. I cleaned the starter, blew it out with compressed air, and put it back together, hoping for the best. The first test of the starter proved more was wrong than the crud in the starter, but the oil was in now, and I was not willing to drain it and take everything apart again, when kicking the motor was so simple. I rode the bike for quite a few miles before the trip, and it stayed clean and oil-free on the outside. Alas, on the trip north, I noticed the oil starting to decorate the engine again. It never became anything but a nuisance, and again, never required more than a cap full of oil from time to time. Now home, and after a bout of issues with the Savage's carb again, the Suzuki was running. Having something else to ride, I now turned my attention to the CB. Other issues have cropped up and I figured I might as well address them as well. I had been heard a clunking sound coming from the bike ever since I returned from North Carolina. I stopped and jumped up and down on the suspension to see if I could find it, but to no avail. I rode to a Cub Scout picnic 15 miles away or so recently with my son on back and we clunk, clunk, clunked all the way there. I knew the sound was not coming from the engine but was frame or suspension related as I could hear it clearly every time I crossed a railroad track or hit a more serious road bump. At the picnic I decided to have a closer look and discovered the source of the sound—all the buzzing of the North Carolina trip had caused a stress fracture across the rear mounting ear of the chain guard. Looking closer I saw that not only was the guard broken, but the front attachment bracket was broken free of the swingarm. I had been given a little 110 volt arc welder by a friend a couple years ago. I had welded a very little bit and that was over twenty-five years ago, so I might as well have had no experience at all. I called my father-in-law, Ronnie, who has on occasion welded stuff back together, and asked him if he would come up and lend a hand with the bike. We rolled the CB out into the sunlight in front of the garage, and while I cleaned up the areas to be welded, Ronnie got the welder set up. Ronnie took the first go at getting it welded, but he could not see through the cheap welding mask that had come with the little welder, and the weld to the bracket didn't hold. I decided there was no time like the present to try my hand again at welding, and with Ronnie manning a quartz shop light aimed at the area, I gave it a go. After several attempts the bracket seemed to be holding, so I turned my attention to the thin chromed guard, clamping the parts together on one side with a pair of vice-grips while welding the other end. With that end holding on its own, the vice-grips were removed and I did a serviceable job on the other end of the crack. Taking the guard out to my woodshop I used my grinder to flatten the weld. A little Strong Arm followed by black paint from a rattle can and the bracket was protected from rust. I bolted it back on. I pulled the tank yesterday with a plan to address the oil leak. It looked like the leak was probably only coming from the cam case cover. I removed the top engine mount and all the acorn nuts with their washers from the eight cover bolts. I had cleaned the head and cam case pretty thoroughly and was fairly convinced that the leak was only at the cover, so back on went the nuts and washers and out came my torque wrench. Set to 14 ft lbs I carefully torqued them all down in the pattern described in my manuals. Once torqued, I started over and found that using the same setting, the bolts now could torqued ever so slightly again before the wrench clicked telling me I had found the right amount again. I also made sure the four screws holding the case to the head were torqued correctly. Hopefully, this will solve my leak. If not, I will have to pull the motor again, which I am not willing to do over such a minor inconvenience. If the cam case cover is not the culprit, then I will live with the leak for the time being. Next up I will be addressing the starter clutch. It will be easier to do with the engine in as compression will aid me in removing the rotor. The rotor requires a special tool for removal; an armed puller will damage the rotor. I found a puller at Motion Pro that is said to work on the SL350, which should be the same as my CB350; at least the parts breakdown shows the same rotor part number for both bikes, and my manual includes the SL along with the CB and CL. I don't know why Motion Pro does not list the CB350 for the tool, but I will soon find out whether it will work. It was only a eighteen dollar tool, so not a big gamble. I am sure the Honda part is no longer available, and if it were the cost would far exceed the cost of the Motion Pro tool. First, I will need to drain the oil. My used oil pan is full to the brim now after changing the car's oil last weekend, so after a run to the auto parts store to dump the oil I will start the process.

Honda CB350 cafe racer project

Leave it stock, says Charlie, but that doesn't mean there aren't performance benefits to be had from running a carefully assembled and well-tuned stock motor.

Howdy! Remember me? It’s been about six months since the last update on my CB350 Cafe-Racer project, but a lot has happened since then. There’s a new baby in the house, which slowed things a little (more), but I am pleased to announce that in addition to having a complex, messy project that consumes all my money, spare time and sanity, I also have a new motorcycle in the garage, my completed 1970 (ish) Honda CB350 cafe racer.

So where are the lavish, porn-quality photos of my new ride that I’ve been teasing you about for the last two years? Patience, my friends. We have unfinished business to discuss, so before you set your comment-phasers on “kill,” to pick apart the aesthetic choices I’ve made, you’ll have to endure a few more installments where I talk about the motor, suspension, brakes, electronics, final assembly, and then, at last, some riding impressions.

There's no sign for Charlie's place, just this old Dream frame hanging over the roll-up door.

The raison d’etre for cafe racer modifications is to make a motorcycle go, stop and turn better, and we’re all most impressed by the ‘go’ part. At the start of the project, I contacted vintage Honda racer Buff Harsh, with the idea that building a fire-snorting race motor wouldn’t be that much more complex than a milder street motor. Not true, it turns out. People claim to have the ‘formula’ for the fastest motor, but it’s never that easy. Not only are the development, blueprinting and hunting down of rare high-performance parts expensive and time consuming, but the end result (though fun) will be difficult to start, ride and maintain—as well as have a shorter lifespan. Charlie O’Hanlon, vintage Honda guru and my guiding hand for this project, advised me to go with a mild state of tune—first-oversize (but stock compression) pistons, a mildly hotter grind on the camshafts, and stock carbs. My favorite machine shop, Moto Machine in San Francisco, did the cylinder bore and freshened up the cyclinder head while Charlie sent the engine covers out for polishing.

Charlie's careful work is evident when you pull the seat off and look at his electrical work. He's proud that he uses the same colors and basic wiring layout as OEM.

This block-off plug saves weight, looks great.

Charlie’s shop is deep in the heart of San Francisco, where there is nowhere to hide from dissatisfied customers. So he focuses on reliability and rideability—after all, you want to ride and enjoy your old bike, not just look at it or show off a framed dyno chart. He convinced me a peaky motor with cantankerous flat-slide racing carbs (which are only happiest WFO) wouldn’t be much fun to ride.

The ’60s were fun, but motorcycle electrical systems from that time weren’t. That’s why Charlie was going to simplify and completely rebuild the CB’s electrical system. A rebuilt stator sends juice to a slick little regulator/rectifier Charlie has vintage parts specialist Vintage Repo manufacture for him. From there, electrons go to a featherweight lithium-iron battery from Shorai. Designed for a small scooter, the battery I selected weighs far less than a pound, a savings of 5 pounds over the big lead-acid unit the stock CB350 uses. In addition to being light, the Shorai holds a charge for up to a year, is zero-maintenance, doesn’t sulfate or produce dangerous gasses and can’t be disposed of in the regular trash. Shorai sells replacement batteries for just about any motorcycle you can think of, at prices roughly equal to what OEMs charge for replacement lead-acid batteries (but significantly more than aftermarket lead-acid batteries).

My little Shorai battery is too small to power an electric starter, but no matter—my leg works fine and the CB has a kickstarter, which combined with an off switch for the headlight, shows how much confidence even Honda’s engineers had in the barely-adequate charging system. A machined starter motor block-off plate covered up the hole where the starter used to live—another few pounds saved.

Dyna coils and ignition send electricity to the points, which will join other 20th-Century relics on the ash-heap of history as soon as they are replaced by the electronic ignition Charlie will be stocking (when he completes a little more development work).

Looks like any old front end, but it hides upgraded springs and Racetech Gold Valve Emulators for a modern ride.

Re-reading my story from July, I noticed a cryptic reference to Superplush Suspension, who rebuilt the fork assembly. Owner James Siddall has been tuning suspension for high-level pavement and off-road racers like Martin Cardenas, Jake Johnson and Dakar rider Jonah Street. He’s done some vintage stuff, and he recommended I call up Racetech and get hold of a set of Gold Valve Cartridge Emulators. These clever little devices sit on tip of your damping rods and actually get the fork to work like a cartridge unit, offering a way to get modern performance—and a much smoother ride—out of old (or just cheap) damping-rod forks. Racetech doesn’t have the emulators for the skinny CB350 fork, yet another reason (aside from the disc front brake) to upgrade to a CB400F front end.

Finally, 23 months after my project started, Charlie emailed—the motor was done, time to bring in all the parts for final assembly…

1968 Yamaha YAS1C

1968 Yamaha YAS1C Twin 125cc


The old seat was totally rusted out. The foam and cover had been eaten by a mouse or rat. This is the old seat pan from a 1974 Yamaha DT100.  I hacked the mounts off the old seat and welded them on to the "new" seat pan.


Won't win any awards, but it's better than what it was before. Probably going to rivet the vinyl in the corners.


Here it is with the side trim and Clubman bars.

This is how you know it's barn fresh.


New sealed battery, EBC brake shoes (thanks Benji!), Michelin Gazelle tires, tubes, and replaced some broken spokes. Oil pump has been bypassed, and seized steering dampener removed. No permanent modifications have been made.


Honda SL70


Gino's dirtbike came in for some new rubber & love....
Wheelie city!

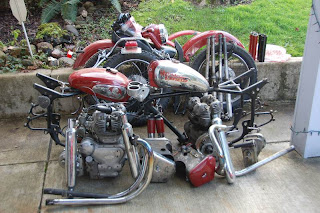
WHAT WE DID FRIDAY ON THE SPORTY CHOP

Chad and  "C.F." Rob were both in Yesterday to give us a hand putting the Ledsled hardtail sporty  back together.  Chad did his first metal flake paint job on his own tins. Really not too bad for a first try!
We also managed to put the top end back together on Robs 53 Panhead. She fired 2nd kick! Here's some pics.
START POINT


C.F.ROB'S NUTS EXPLODING!